27 September, 2014

How to install gparted (partition editor) on Ubuntu 14.04 LTS / Debian wheezy / Raspbian

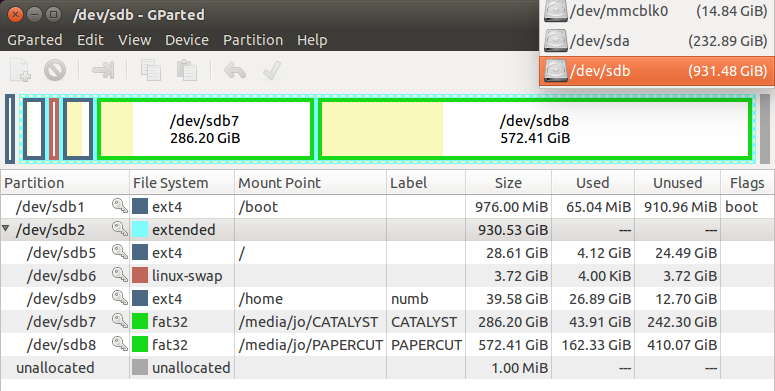
Here is how to install one of the coolest partition editor for  Ubuntu 14.04 / Debian wheezy / Raspbian

Gparted a GUI based application that helps to work with partitions on your memory devices. It is packed with many features like
  •     Create partition tables, (e.g., msdos or gpt)
  •     Create, move, copy, resize, check, label, set new UUID, and delete partitions
  •     Enable and disable partition flags, (e.g., boot or hidden)
  •     Attempt
  •     Create space for new operating systems

GParted works with the following storage devices:
  •     Hard disk drives (e.g., SATA, IDE, and SCSI)
  •     Flash memory devices, such as USB memory sticks and Solid State Drives (SSD’s)
  •     RAID Devices (hardware RAID, motherboard BIOS RAID, and Linux software RAID)
  •     All sector sizes (e.g., devices with 512, 1024, 2048, 4096 byte sectors and more)


Update your software repository listing using the apt commands from the terminal:

sudo apt-get update


Now install gparted using the below given command

sudo apt-get install gparted


Once the installation is complete, launch gparted using the following command and provide the root credentials


sudo gparted


Read rest of entry

23 June, 2010

How to recover Grub 2 in Ubuntu

The new versions of Ubuntu from 9.10 are preloaded with the new version of the Grub ie. Grub 2 as the default boot loader. Grub 2 has many modification over the previous versions. It is driven by a group of scripts in different directories in /boot and /etc. I have already blogged about configuring grub 2 to change the appearence, adding a background image etc... on to the boot loader menu in a previous post. This post is all about restoring the grub 2 in an occasion where you lost your current grub 2 boot loader overwritten by some other boot loader installation. This possibly occurs when you install multiple operating systems on a machine, and especially when some other OS after the Ubuntu. This is a simple and working tip, try it.


U should need following tools for this . . 

1. An Ubuntu Live CD (9.10 or any later versions)
2. The partition where your Ubuntu resides (that u are going to 
     restore), It should be something like /dev/sda12

 Follow the steps

Take the terminal and follow the steps 

$ sudo fdisk -l
  • Now, you need to remember which device listed is your linux distribution, for reference, /dev/sda1 will be used. Now weneed to mount the filesystem to/mnt
 $ sudo mount /dev/sda1 /mnt
  • If you have /boot on a separate partition, that need's to be mounted as well. For example /dev/sda2 is used here.
$ sudo mount /dev/sda2 /mnt/boot  

     Now mount the rest of your devices 

  $ sudo mount --bind /dev /mnt/dev
  • Now chroot into your system 
 $ sudo chroot /mnt

      You should be chroot'd into your system as root, you can now
       run commands as root, without the need for sudo.
  • Now edit the /etc/default/grub file to fit your system 
 $ nano /etc/default/grub
  • When that is done you need to run update-grub to create the configuration file. 
$ update-grub
  • Now install GRUB 2 to the MBR as follows
$ grub-install /dev/sda
  • If you encounter any errors, try 
    $ grub-install --recheck /dev/sda
  • Press Ctrl+D to exit out of the chroot.
  • Once you exit back to your regular console, undo all the mounting,
$ sudo umount /mnt/dev
$ sudo umount /mnt

(But if you have a separate boot partition which you mounted earlier, you have to unmount this first, or you will get a "device busy" error message.)
  • That's all you have to do with your Live CD. Exit the terminal and restart your machine.  
If you had alternate OS entries, update-grub might say "Cannot find list of partitions!". Ignore it and continue...
When rebooted the grub 2 boot loader will be ready for you. Don't worry if you don't see other operating systems that are already installed in your system. Once you can boot into your linux installation,  rerun update-grub and grub-install /dev/sda as root. This will add the entries of the other operating systems in to the current boot loader.


Read rest of entry

12 May, 2010

Speed up the startup and shutdown process in Windows XP : registry tweak

Let's try some trick for increasing the speed of booting and shutting down of Windows XP through the group policy editing. 

Open the RUN command using Windows+ R key combination or from the  start menu and type notepad.

In NOTEPAD, copy del C:windowsprefetch tosboot-*.*/q

And save it as ntosboot.bat in your computer

Again open the RUN command and type gpedit.msc 

Click on the COMPUTER CONFIGURATION in the left side pane , under that double click WINDOWS SETTINGS and then double click on the  scripts in the  right pane


Again Double Click on the SHUTDOWN in the right window. Then click the  ADD button and then BROWSE to select the saved file ntosboot.bat and open it. (shown in figure)


Choose OK and APPLY , Once again click OK and then exit.

Now open the device management window. Take the RUN prompt and type in as  devmgmt.msc

A new window will open under that double click on IDE ATA/ATAPI controllers. Right Click on Primary IDE Channel to select properties
(Shown in the figure)


Choose the tab called ADVANCED SETTINGS then click on the device 0 or 1, The device contain device type which is not highlighted and chose none in the place of autodetect and Click OK


Now select Secondary IDE Channel and select properties and repeat the process as done above.
 
That's all  for the time being. Just restart your system to see the changes.

Read rest of entry

25 April, 2010

Changing the entries in boot loader of Ubuntu

This post will show you how you can change the order, color, text etc that
are shown in the boot loader (grub) of your Ubuntu linux. The configuration
files that are needed to boot your Ubuntu linux are residing in the  menu.lst
file in boot folder
Let use the terminal to edit those entries easily

1.  Take the gnome terminal and type in the followin command to back
up the menu.lst file

$sudo cp /boot/grub/menu.lst  /etc/grub/menu.lst.bak


2.  Open the file in  gedit text editor with all permissions as follows

$ sudo gedit  /boot/grub/menu.lst

3.  Go to the end of the file and there you will see the list of entries that
are shown by the grub as shown in the figure…


4.  Rearrange the entries as if you wish in that list by just cutting-pasting.
U can change the name of the entry also…Look how I changed the first
entry as “myUbuntu”


Changing the timeout for automatic booting

Lookout for the entry like ” timeout      10 “  in the menu.lst file. Change
its value to some other value, the value is expressed in seconds…


Changing the color pattern

Lookout for the entry “Pretty colors”..
 
Remove the # symbol infront of the line   “#color cyan/blue white/blue”

5. After making the required changes save and close the file to make thechanges available to the system… If the menu.lst file had corrupted accidently in some ways, just relax and copy back the menu.lst.bak file to menu.lst file as follows

$ sudo cp /boot/grub/menu.lst.bak /boot/grub/menu.lst
Read rest of entry

Configuring the new GRUB 2

As you know GRUB is the software used by debian operating systems like Ubuntu… for loading and transferring control to the operating system kernel during the initial boot. The new version grub2 has many differences from the previous versions of grub in many aspects of configuring and tweaking. GRUB 2 will be installed by default on new installations of Ubuntu (Karmic).While the main grub boot loader file continues to reside in the /boot/grub folder, it is no longer called as menu.lst in GRUB 2. The main Grub 2 instruction file is now grub.cfg. This file is produced by various scripts. The files responsible for the content of grub.cfg are /etc/default/grub and individual script files located in /etc/grub.d/. The changes made to this scripts are taken  into effect when “update-grub” command is issued on the terminal.

Configuring the GRUB 2To make changes to the new GRUB 2 we have to make changes to the script files… So let us discuss about the important configuration files…


grub.cfg (/boot/grub/grub.cfg)

Please don’t make any changes to this file. This is the main configuration file, and it is the sum total  of all the scripts that affects the GRUB 2. grub.cfg is the configuration file and it is not the script, you have to change the scripts to modify the grub and not the configuration file.  You have to run the “update-grub” command to make the changes into effect (to rebuild the grub.cfg)

grub (/etc/default/grub)

1. Type  $ sudo gedit /etc/default/grub to open this file

This file contains information similar to /boot/grub/menu.lst. It contains settings primarily affecting Grub’s menu display. This file can be edited by root to make changes to these settings. These changes will be imported into grub.cfg when “update-grub” is executed.let us discuss about some of the entries in this file
GRUB_TIMEOUT=5
This is the number of seconds before the default entry is automatically booted. Setting a value of -1 will display the menu until the user makes a selection (no timeout).
GRUB_DISABLE_LINUX_RECOVERY=true

Add or uncomment this line to prevent “Recovery” mode kernel options showing in the menu.


2. Save and close the file.
3. Issue the following command in the  terminal

$ sudo update-grub

/etc/grub.d/ (folder) 
1. Type in     $cd /etc/grub.d/  to enter into this folder. Issue a ls command to see all the configuration files in this folder


2. We have to modify the 05_debian_theme script file to change the appearance of boot loader. So open that file using the terminal as follows
$ sudo gedit 05_debian_theme (file opened in gedit text editor)

3.Changing colors
look at the 8th & 9th row (first set up color of text, second selected row):
set menu_color_normal=magenta/black
set menu_color_highlight=cyan/blue
(change the colors as per your wish)

4. Setting  background image for grub 2

1. Check for the line in the script file as shown in the figure below


2. Here i set my grub background as a picture file, boot.png

What you have to do is just copy a picture file to /usr/share/images/desktop-base directory. I am just assuming that picture file is now in your desktop.

$sudo cp /home/username/Desktop/filename.png  /usr/share/images/desktop-base/


3. Change the 16th line (shown in fig below ) by replacing the word filename with boot
for i in {/boot/grub,/usr/share/images/desktop-base}/filename.{png,tga} ; do

4. That’s enough for the time being. Now save and close the 05_debian_theme  script file

5. Run the command $ sudo update-grub to rebuild the grub.cfg file. Then you will see the output as follows…


Read rest of entry

14 May, 2009

How To Reinstall grub in Ubuntu (upto Ubuntu 9.04)

1. Put the ubuntu installation disk in your drive and boot it with the live cd option.
2. Open gnome terminal and type the following commands...

$ sudo grub

~ find /boot/grub/stage1

then the terminal will show you the partitions with stage 1
for the time being let it be the following..

hd(0,5)

~ setup hd(0,5) or ~ install hd(0,5)

3. Exit terminal.

It's the time to restart your system and see the reloaded grub !!!
Read rest of entry
 

Terminal Diary | techblog Copyright © 2009 Gadget Blog is Designed by jintu jacob Powered by Blogger