28 June, 2010

important bash commands for system administration


As you know the terminal is the power tool that every linux user may have to come in contact even once in their computer life. Here is a post about controlling and managing your system using the gnome terminal.

How to shut down the system
 

$shutdown -h now

The word 'now' is enough to shutdown the system at this instant itself. You must be sudo before executing this command. You can specify the time instead of the word 'now' so that the system will shut after that time limit. Other  valid  formats  are  +m,  where m is the number of minutes to wait until shutting down and hh:mm which specifies the time on the 24hr clock.

       -r     reboots the system after shutdown

       -h    Requests  that  the system be either halted

              or powered off after it has been brought 
              down

       -c    Cancels  a  running  shutdown.   TIME is not 

              specified with this option, the first     
              argument is MESSAGE.

       -k    Only send out the warning messages and 

              disable  logins,  do  not actually bring the 
              system down.

How to take the root shell prompt
 

You can take the root shell prompt using the root password as follows

$ sudo su
 

How to switch between virtual consoles

In most debian based systems there are six switchable VT100-like character consoles available to start the command shell directly on the Linux host. Unless you are in a GUI environment, you can switch between the virtual consoles by pressing the Ctrl - Alt keys and one of the F1 --- F6 keys simultaneously. Each character console allows independent login to the account and offers the multiuser environment. You can get back to the X Window System, normally running on the virtual console 7, by pressing Ctrl - Alt - F7

Alternatively we can use the command chvt to  switch between virtual consoles from the command line
 

$ chvt  3        (switches to 3rd console )


How to quit the terminal

Press Ctrl + D to terminate the shell activity.


To create a new user account 


To create a new user account from the terminal type in as follows...


$ adduser carbon


This will add the user with name 'carbon'.  You can remove this user and it's home directory by using the following command.

$ deluser --remove-home carbon


Read rest of entry

23 June, 2010

How to recover Grub 2 in Ubuntu

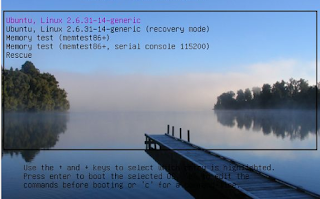
The new versions of Ubuntu from 9.10 are preloaded with the new version of the Grub ie. Grub 2 as the default boot loader. Grub 2 has many modification over the previous versions. It is driven by a group of scripts in different directories in /boot and /etc. I have already blogged about configuring grub 2 to change the appearence, adding a background image etc... on to the boot loader menu in a previous post. This post is all about restoring the grub 2 in an occasion where you lost your current grub 2 boot loader overwritten by some other boot loader installation. This possibly occurs when you install multiple operating systems on a machine, and especially when some other OS after the Ubuntu. This is a simple and working tip, try it.


U should need following tools for this . . 

1. An Ubuntu Live CD (9.10 or any later versions)
2. The partition where your Ubuntu resides (that u are going to 
     restore), It should be something like /dev/sda12

 Follow the steps

Take the terminal and follow the steps 

$ sudo fdisk -l
  • Now, you need to remember which device listed is your linux distribution, for reference, /dev/sda1 will be used. Now weneed to mount the filesystem to/mnt
 $ sudo mount /dev/sda1 /mnt
  • If you have /boot on a separate partition, that need's to be mounted as well. For example /dev/sda2 is used here.
$ sudo mount /dev/sda2 /mnt/boot  

     Now mount the rest of your devices 

  $ sudo mount --bind /dev /mnt/dev
  • Now chroot into your system 
 $ sudo chroot /mnt

      You should be chroot'd into your system as root, you can now
       run commands as root, without the need for sudo.
  • Now edit the /etc/default/grub file to fit your system 
 $ nano /etc/default/grub
  • When that is done you need to run update-grub to create the configuration file. 
$ update-grub
  • Now install GRUB 2 to the MBR as follows
$ grub-install /dev/sda
  • If you encounter any errors, try 
    $ grub-install --recheck /dev/sda
  • Press Ctrl+D to exit out of the chroot.
  • Once you exit back to your regular console, undo all the mounting,
$ sudo umount /mnt/dev
$ sudo umount /mnt

(But if you have a separate boot partition which you mounted earlier, you have to unmount this first, or you will get a "device busy" error message.)
  • That's all you have to do with your Live CD. Exit the terminal and restart your machine.  
If you had alternate OS entries, update-grub might say "Cannot find list of partitions!". Ignore it and continue...
When rebooted the grub 2 boot loader will be ready for you. Don't worry if you don't see other operating systems that are already installed in your system. Once you can boot into your linux installation,  rerun update-grub and grub-install /dev/sda as root. This will add the entries of the other operating systems in to the current boot loader.


Read rest of entry

15 June, 2010

how to install gnome-do application launcher in Ubuntu

GNOME Do is a free application launcher for Linux originally created by David Siegel, and currently maintained by Alex Launi. It is better than other application launchers because it not only allows searching for applications and files but it also allows specifying actions to perform on search results by providing instantaneous, action-oriented search results that preferred by the users. 

It is equipped with different appearence or styles, the important of them are docky style and glass style


installation. . .

 Take the terminal and type as follows
$ sudo apt-get install gnome-do gnome-do-plugins
Read rest of entry

How to install the Ubuntu netbook remix launcher in Ubuntu 10.04


                     Ubuntu netbook remix is a new and light version of the ubuntu linux with appearance customized for the netbooks to compete with the moblin. For gods sake it's also applicable in desktops and laptops too. This post is about my experiments with the ubuntu netbook remix. 

                     When i heard about the netbook remix edition first, i thought it was bit different than the usual ubuntu linux. So i began to download the netbook edition iso from the Ubuntu website. On installing it i found mear resemblance of it with the lucid lynx. When firstly booted the new and fresh desktop welcome me. See the pictures. The appearance was so good but the problem is that the netbook launcher which is installed over the gnome was taking a long time to respond. The mouse clicks are not correctly laid. The click will go somewhere else and felt it so cumbersome, but applications didn't felt any lagging after loading except the netbook launcher in the desktop. Thus the craze had got a tragedy end.

                     I turned back to my ubuntu 10.04 and began working with it for a while. After a day when looking over something in synaptic package manager the slow responding netbook launcher came to my mind again. I just search for the word netbook in the synaptic. There i found a lot of netbook related application suitable for ubuntu. Of the list i just selected netbook-launcher and started installing it. Everything gone right and loaded the launcher. Once again the launcher started lagging and hanging similar to the situation that i have faced while installed the Ubuntu netbook remix edition. Bad luck again, no way to continue due to this lagging. So i decided to stop my craze towards the netbook appearence by removing the just installed package. After completing the removal i look over the other netbook related packages in the synaptic once again. There i found a package with description 'a lite version of netbook launcher written in EFL' and found it already installed. Taken the terminal and typed in the command, it was there and loaded. To the great extend of amazing the lite version of the netbook launcher was responding very quickly and i felt the change when i hover the cursor over the launcher. The EFL launcher is nice and running in my laptop without any conflict with the compiz window manager. Those are the screen shots...


Installation

Take the synaptic package manager

System => administration => Synaptic Package manager


search for the package netbook-launcher-efl . Click on it and select the mark for installation. Click on the apply button to start downloading the package and installing it.


After installing, take the gnome-terminal and type in as follows

$ netbook-launcher-efl

Then the netbook launcher application will start in the next moment.

You can add this netbook launcher to load automatically everytime you boot. Take the startup application from System => Preferences => Startup Applications


Click on the add button and type in the textbox corresponding to the command as 
netbook-launcher-efl


Thats all... enjoy the Netbook remix in your box...
Read rest of entry

How to change the desktop background automatically in ubuntu


Desktop drapes is a wonderful software that automatically switches the desktop background of the ubuntu. You can configure it so that how much time a picture should be shown as the background image or select a folder so that the pictures in that folder will be used as the desktop background one after the another.


How to install the drapes . . .

$ sudo apt-get install drapes


Read rest of entry

05 June, 2010

How to setup your mobile phone to recieve email alerts (for Nokia)


                        You can read or write emails from your mobile phone without any phone browsers (wap/web) by following this post. All the gprs enabled mobile handsets of Nokia comes up with an email client which is similar to outlook express or evolution or thunderbird but with basic inbox features such as sending and receiving only. Inorder to get this client working properly you should have a gprs /edge connection to get connected to the pop server.

I started setting up my email client of Nokia 5200, which is a java based mobile phone. This tip is possible in almost all the java phones. The email  client in this phone has 3 custom folders, an archive folder and a junk folder..

Activating the email  account 

1.  From the Menu select the Messaging option. Scroll down the list to find the E-mail option. 

2.  Select the new account option to start. Then the phone will ask for email service that you have. Multiple accounts are possible. Let select the gmail now. Enter your account details in the text boxes. Dont append the @gmail at the end of the username.

3.  On the next window you have to enter the incoming and outgoing sever information...

Incoming server

servertype: POP
servername: pop.gmail.com
incoming username: your_username@gmail.com

Outgoing serever

servername: smtp.gmail.com
username & password : select the option 'same as the incoming '

4.  On the next window the phone will ask for retrieval settings. On the secure login option check the radio of 'automatic option'. This will prompt for the password when start retrieving the emails. Click on the OK button to complete the current step.

5.  You can add the signature portion to each of the email by clicking the optional advanced setting. Press OK to complete the settings and to start receiving email on your phone without any wap/web browsers.


Read rest of entry

03 June, 2010

How browse wap sites using Mozilla Firefox


wapsites are a great source of music and videos that can be used in your mobile phones free of cost. By default the desktop browsers do not support loading the wapsites, istead they have support only for different website formats . This trick is all about equipping the firefox browser to load the wapsites by installing an addon called wmlbrowser...

Select Add-ons from the tools menu in the firefox. Click on the Get addons button and enter wmlbrowser in the search box. Install the addon completely and follow the steps thereby. You have to restart the firefox to make the changes into effect.


One among the content rich wapsites waptrick.com

Read rest of entry

How to add Twitter and Facebook gadgets to gmail inbox


This is simple technic lets you to add both the facebook and twitter gadget to the left side of your gmail inbox. You can see the tweets, direct messages and perform all the twitter activities from within your gmail account. The case is same for the facebook also...


Follow the steps to setup this feature in your gmail inbox.

1. Login  to your gmail account and take the google labs from the more --> even more button.


2. You will be redirected back to your inbox, with settings tab opened. Enable the Add any gadget by URL option and save the changes.


3. Then click on the Gadgets tab and add the URL of the twitter and facebook gadgets by copying the following lines onto the text box given there


4. Thats all for now.  You can write your tweets in the widget box in the left side and see everything in twitter by clicking on the expand button


Read rest of entry
 

Terminal Diary | techblog Copyright © 2009 Gadget Blog is Designed by jintu jacob Powered by Blogger