27 September, 2014

How to install gparted (partition editor) on Ubuntu 14.04 LTS / Debian wheezy / Raspbian

Here is how to install one of the coolest partition editor for  Ubuntu 14.04 / Debian wheezy / Raspbian

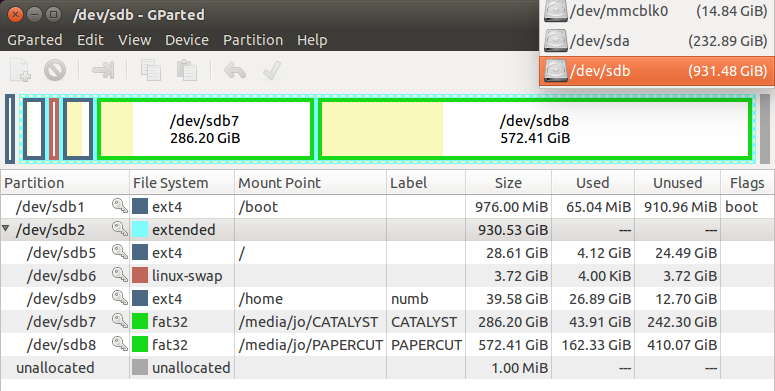
Gparted a GUI based application that helps to work with partitions on your memory devices. It is packed with many features like
  •     Create partition tables, (e.g., msdos or gpt)
  •     Create, move, copy, resize, check, label, set new UUID, and delete partitions
  •     Enable and disable partition flags, (e.g., boot or hidden)
  •     Attempt
  •     Create space for new operating systems

GParted works with the following storage devices:
  •     Hard disk drives (e.g., SATA, IDE, and SCSI)
  •     Flash memory devices, such as USB memory sticks and Solid State Drives (SSD’s)
  •     RAID Devices (hardware RAID, motherboard BIOS RAID, and Linux software RAID)
  •     All sector sizes (e.g., devices with 512, 1024, 2048, 4096 byte sectors and more)


Update your software repository listing using the apt commands from the terminal:

sudo apt-get update


Now install gparted using the below given command

sudo apt-get install gparted


Once the installation is complete, launch gparted using the following command and provide the root credentials


sudo gparted


Read rest of entry

17 September, 2014

Unboxing Raspberry Pi B+

And raspberry pi is home yesterday... Here are some snaps  while i unboxed it.


Read rest of entry

16 September, 2014

Raspberry Pi & accessories - purchase guide in India


All the Raspberry Pi accessories are home yesterday. In India there are lot of online purchase options for raspberry pi and accessories from leading online sellers like ebay.in, amazon etc... I would like to tell you from where I collected it rather than where all it can be purchased( That will be gross, since there are whole lot of providers around here)


Raspberry Pi B+ SoC

Both these sites sell comparitively less priced B+ boards than ebay/Amazon during the time of my purchase. I chose CrazyPi and got the delivery within a week of the order.


Clear Case for B+

There are better cases available in amazon and CrazyPi.com. The one that I chose was cheaper though good looking. B+ got two LEDs on the board with red and green color. FYI, A transparent/acrylic  case will defenitely look geeky, than the clumpsy plastic case


SD card
Out of the a whole list of SDcards that Pi can run i just chose - Sandisk Ultra microSDHC 16GB Class 10 Memory Card with Adapter. If you need to know the entire list of SD cards supported by the Raspberry Pi, following page will be handy - http://elinux.org/RPi_SD_cards


USB Wifi Dongle

This is seems to be the cheapest wifi dongle that the B+ can run. Need some work around for installing the firmware for the B+, still range is almost similar to my Xperia mini's antenna.

If you are looking for some other options here is your handbook - http://elinux.org/RPi_USB_Wi-Fi_Adapters


USB BlueTooth dongle

Initially I worried whether it will get detected by the rPi, however even during the boot itself you can see the trace of this dongle getting noticed by the Pi.


HDMI cable (if your tv supports hdmi)

Get a cable that is fast and long enough. Ebay got more options than other stores


HDMI to VGA adapter (optional)
Ordinary HDMI to VGA converters dont work with the Pi. You can get one from carzyPi store that have Digital to analog signal conversion chip. This adapter is completely different from the regular hdmi vga converters available in ebay.


5V/750mA Power adapter ( aka your smartphone's charger)

If you want a dedicated power adapter, a NOKIA Lumia's power cable will be the easy option that can output 5 Volts and ~750 mA. In all other cases your smartphones charger will be the alternative.


Read rest of entry

What happened when I heard about a raspberry Pi


The enthusiast inside me was just sleeping for a while (possibly around 3 years due to the damn corporate IT culture). And technically that was the reason why there wasn't enough posts recently. Suddenly last month on a trip to Coorg with @asuthoshjg & @nikhilkv, I heared about this little nasty motherboard from @asuthoshjg. The whole reason for the raspberry pi to hit our conversation was just my concern about a 4GB SD card in dslr that will easily run out of memory before we reach Coorg via Mysore. And pi just got hooked enough into my brain that browsing about it was the first thing that I did when reached back home after a sleepless night of driving and hunger.

The one best paragraph that explains everything about the pi in their community website is added below.

The Raspberry Pi is a credit-card sized computer that plugs into your TV and a keyboard. It is a capable little computer which can be used in electronics projects, and for many of the things that your desktop PC does, like spreadsheets, word-processing and games. It also plays high-definition video. We want to see it being used by kids all over the world to learn how computers work, how to manipulate the electronic world around them, and how to program.


It was one of the interesting things that I heared recently apart from the understanding that Saturday and Sunday are holidays at my workplace (sigh - literally). The another thing that increased my anticipation was that pi was available for online purcase at lot of sites. And I started getting excited about a pocket cpu that is powered by ARM6 700 Mhz processor with 512MB RAM, 4 USB ports, ethernet port and hdmi out at 4k-5k along with accessories. The plan was to replace the  plan of purchasing a vaccum-cleaner ( countless requests from my mother since last months) with the raspberry Pi. 


The funniest part was, Pi will just improve the count of number of computers (used and unused) at my home by 4. Four is a good number, by the way. It was not the Pi alone, but it was the enthusiasm and same old interest to these kind of stuffs when i was at my college, that is coming back to home along with the Pi soon.


Hopefully another post will be ready soon in a week when I get my hands on the Pi...


Read rest of entry

17 August, 2011

setup lamp server on debian/ubuntu || the easiest & the best way


The LAMP server is the commonly abbreated for Linux Apache MySql PHP server. This is a platform where web pages can be build/test/run using linux.

So setting up your LAMP server includes installing all those above said packages and configuring them to work together.

You can use either terminal or synaptic package manager to install these packages [and should have a working internet connection]. Anyway we may have to use the terminal for configuring them. So better move with the Terminal [Applications > Accessories > Terminal] itself.

1. Install Apache server

------------------------------
Below command will install apache server in your system


$ sudo apt-get install apache2

when the installation finishes, test weather it's working by pointing your web browser[firefox / chrome . . . ] to the following web address.
http://localhost/  

You should see a folder entitled apache2-default/. Open it and you will see a message saying something like > "It works!"

2. Install PHP

- - - - - - - - - - - - -

copy-paste the command given below onto a terminal and hit the enter key.


$sudo apt-get install php5 libapache2-mod-php5

While PHP installation finishes, restart the apache web server to make it compatible with apache using the following command.


$ sudo /etc/init.d/apache2 restart

testing PHP

To ensure there are no issues with PHP let's give it a quick test run.

Step 1. In the terminal copy/paste the following line:


$ sudo gedit /var/www/test.php

This will open up a file called test.php.

Add the following line into the test.php, save and close the file.


  <?php
      phpinfo();
  ?>


Now open you're web browser and type the following into the web address:


http://localhost/test.php


Note : You can change the location of the Document root [by default it is /var/www/] by reading this article.

Install MySQL
- - - - - - - - - - - - - - 

open up the Terminal and then copy/paste this line:


sudo apt-get install mysql-server libapache2-mod-auth-mysql php5-mysql


install phpmyadmin
-------------------------


sudo apt-get install phpmyadmin

Now just restart Apache and you are all set!


sudo /etc/init.d/apache2 restart


That's enough! your LAMP server  is ready, and now you can can move up with your pretty codes >>
Read rest of entry

07 July, 2011

Change the DocumentRoot of Apache webserver (/var/www) in Debian / Ubuntu

The document root (also called as the web root) of the Apache web server is located at the /var/www directory by default. Document root is the place where we find all the web pages and server scripts. These files are loaded on the browsers when we type in a particular url to point to that server. 

The /var/www directory doesn't allow access for a user who doesn't have the root permission. It's a headache task to switch to the root mode by typing in the root password everytime even though you know the password, since you may have to change your webpages or scripts during its development stage  very frequently. So a better idea to avoid this problem is to change the default Document root directory to some other location which doesn't require root permission for access.


Change it dude !!!
- - - - - - - - - - - - - - - - - -#

Inorder to change the document root,

#1. Make a directory somewhere inside your home directory to use as the Document root. (not necessarily be home... you can make it anywhere). I named it 'www'

$ mkdir /home/jo/www

#2. Now we have to edit the one of the configuration file of the Apache webserver. The file is located @  /etc/apache2/sites-available/default (requires root permission to edit it).

$ sudo gedit /etc/apache2/sites-available/default

The file will be opened up in the gedit text editor. Now you have to edit the DocumentRoot directive in this file. Replace the /var/www with the /path/to/your/new/document/root in the lines 4 and 9 as shown in the figure below.


#3. Restart the apache webserver.

$ sudo /etc/init.d/apache2  restart


Now test it !!!
- - - - - - - - - - - - - - - - - -#

#1. Create a html/php file inside the Document Root directory (mine is @ /home/jo/www).

#2. Take the terminal and navigate to the Document Root directory (using cd command). Use chmod command given below to allow read+write+execute permission to all.

$ chmod 777 *

#3. Take your web browser and type in http://localhost and hit the enter key! The apache server will load the contents of your Document Root directory as in the figure.


Hope you have done it right!!!


Read rest of entry

Use the Debian Squeeze DVD/pendrive as a package repository

The Debian Squeeze DVD contains many application level packages which are not installed during the base operating system installation. Only core packages are installed during the basic Debian Operating system installation. For example the DVD is loaded with the graphical display managers such as Gnome, KDE and XFCE, but during the installation you can select only one among them.  There are a lot more stuff in the dvd, such as vlc media player, phpmyadmin, mysql etc. Here I am sharing how i used these Debian squeeze DVD as a repository to install those packages.

Adding the dvd to the repository
                 --------------------------------------------------

Take the terminal and type the following

$ sudo apt-cdrom add


This will add your DVD to the repositories list. 


For those who are using the pendrive as the installation media, pendrive should be mounted on the /media/cdrom directory. This can be done in two steps.


#1. Plug in the USB pendrive, then the new block device will be added under the /dev directory. We have to find this block device location for mounting and using the device. Use the following command to detect the block device's filename (selected in the image).
$ sudo fdisk -l


#2. Mount the block device into /media/cdrom.  

$ sudo mount  /dev/sdb1  /media/cdrom/


#3. Add the cdrom to the software repository list, as described earlier in the  case of the DVD.

$ sudo apt-cdrom add


Installing Packages
-------------------------------------
Now install the packages using the apt package manager. Check the sample below :- 
$ sudo apt-get install vlc

Thatz up...This trick will work for Ubuntu also...
Read rest of entry
 

Terminal Diary | techblog Copyright © 2009 Gadget Blog is Designed by jintu jacob Powered by Blogger